
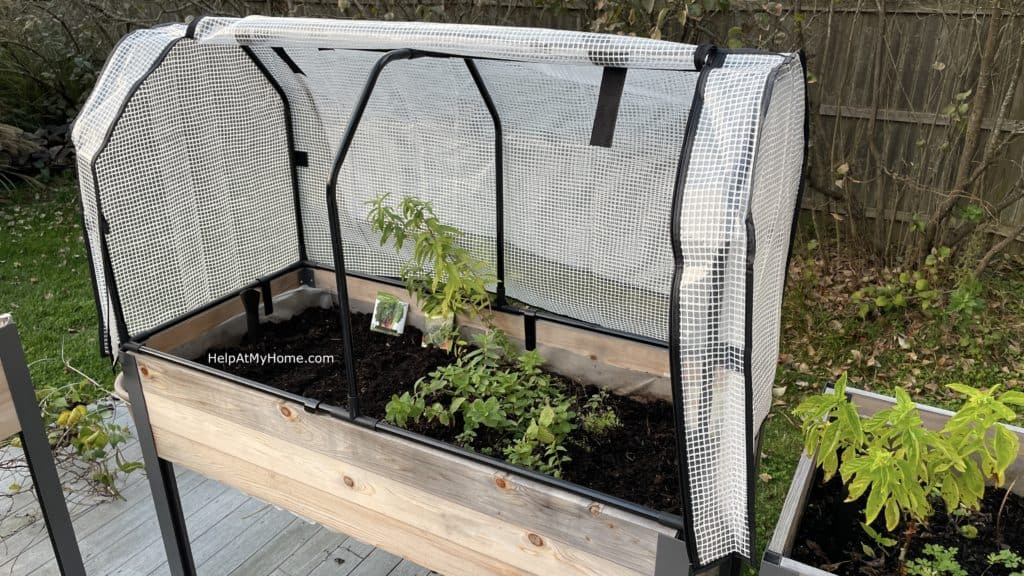

If you have a CedarCraft elevated planter there is a good chance you wanted to extend your growing season with a greenhouse and/or protect your plants from bugs and birds with the optional cover. I bought this cover in order to get some early spring and late fall herbs and possibly beans from my planter.
Here are the instructions on how to assemble the greenhouse cover.
Greenhouse Video Assembly
Not interested in reading the instruction manual? No problem. Here is my assembly video…
Not interested in a video? Read on.
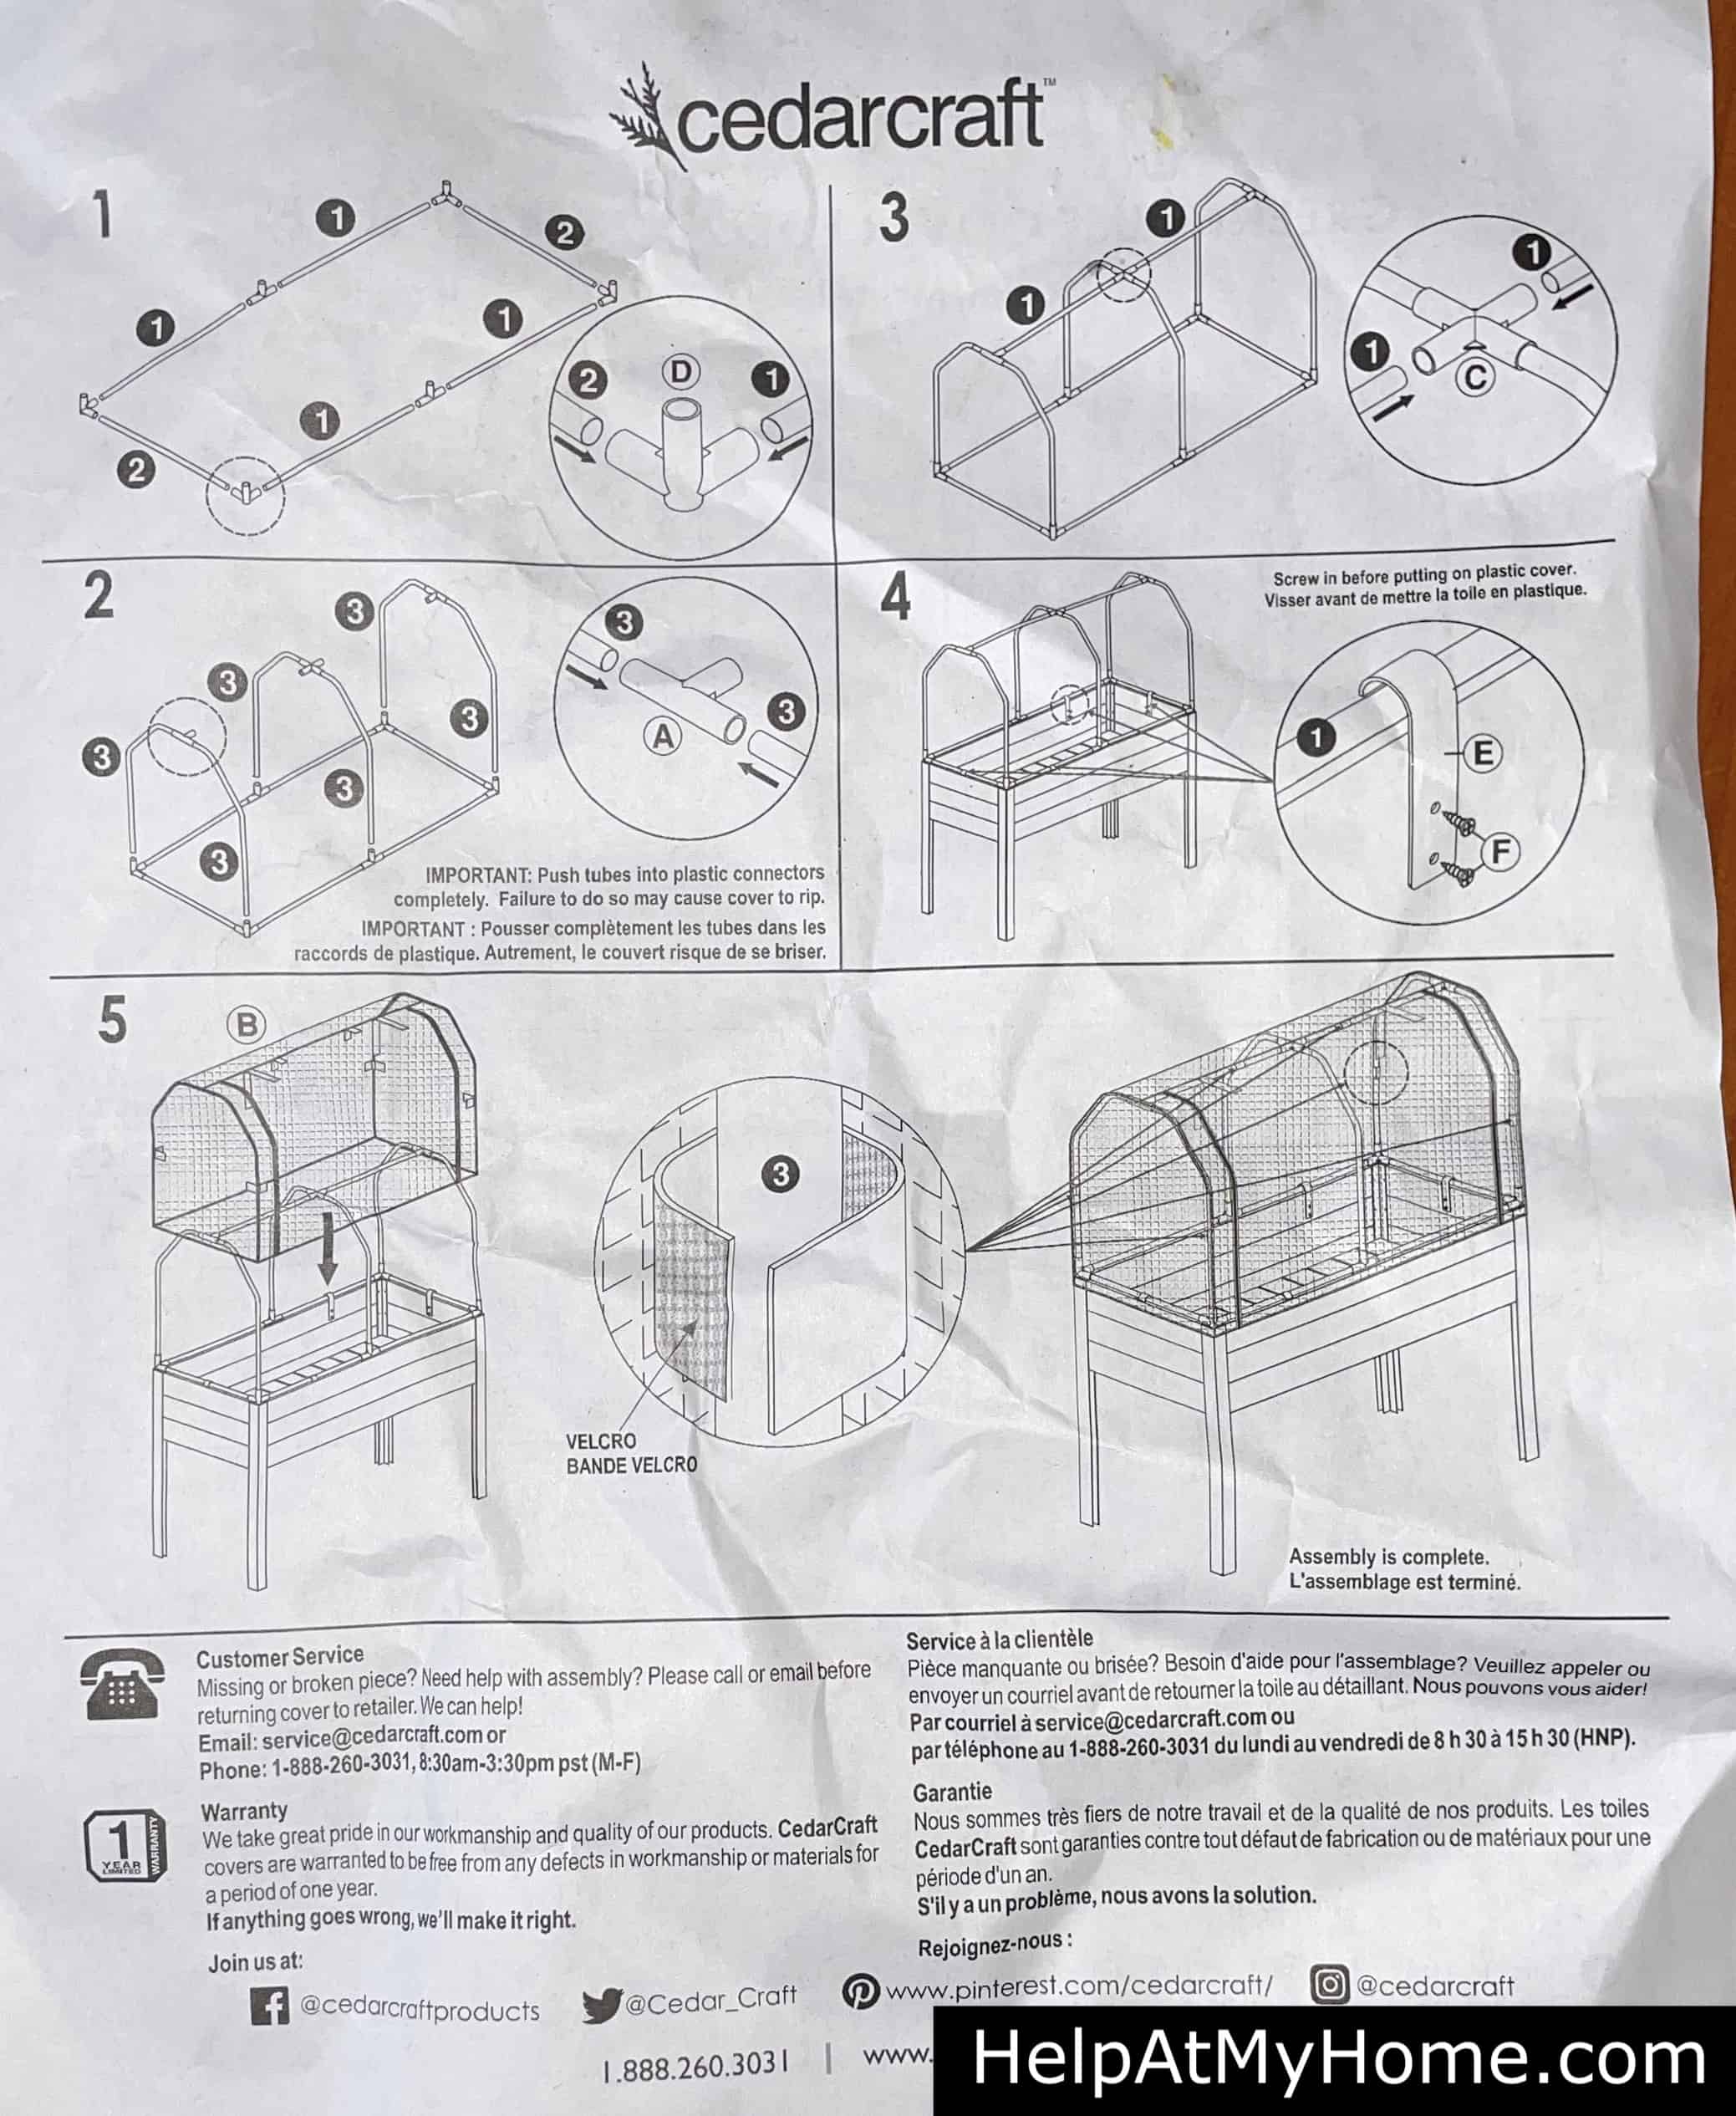
CedarCraft Greenhouse Instruction Manual
If you have the greenhouse but put it away for the winter or otherwise can’t find the instructions then don’t worry, we’ve scanned in a copy of the instructions.
It’s available as PDF file here: CedarCraft Elevated Planter Greenhouse Assembly Manual.
Assembling The CedarCraft Greenhouse
The actual assembly process is quite simple. As you can see in the instructions as well as the video, the most important part is to differentiate between the six long pipes and the two short ones.
- Four of the six long pipes form the long sides of the rectangle, which is the base of the greenhouse. They combine with a “T” shape plastic joint to form the long (41″) side of the greenhouse base.
- The two short pipes go at the ends of the rectangular base and form the short (27″) ends.
- The last two pipes form the roofline at the center of the greenhouse.
And then my main piece of advice would be: when pushing the pipes into the plastic joints, go slow, push straight, and don’t use too much force. If anything is going to go wrong with this built, it is going to be breaking a plastic joint by pushing too hard or at an angle!
Affixing The Greenhouse To The Planter
The last step will be placing the greenhouse frame on the planter and then installing the four metal hooks. These are screwed into place with eight wood screws.
The hooks should go on the inside of the greenhouse so that they can do their job without being seen. The wood screws go right into the cedar (or spruce) with no pre-drilling required. Just don’t over-tighten the screws and it’ll go fine!
Unfortunately, the hooks don’t turn or pivot so if you want to remove the greenhouse frame from the planter you will need to entirely remove the eight screws and the four hooks. You could, of course, leave the frame on and simply remove the plastic greenhouse or bug housing, but the bare frame won’t look great on your otherwise nice patio.
Overall installation time for each greenhouse should be just about 15 minutes. It’s a fun, easy project that will mean a lot more growth from your CedarCraft planters!